> For the complete documentation index, see [llms.txt](https://docs.mosip.io/1.2.0/llms.txt). Markdown versions of documentation pages are available by appending `.md` to page URLs; this page is available as [Markdown](https://docs.mosip.io/1.2.0/id-lifecycle-management/support-systems/partner-management-services/functional-overview/device-provider.md).
# Device Provider
\*\* PMS Portal is used by both; **PMS Admin** and **Partner User**.
* Partner Administrator: Partner Admin
* Partners: Partner User
## What all activities can a 'Partner Admin' perform on a Device Provider?
Being a 'Partner Admin' you can perform following 3 activities to complete the end to end functionality pertaining to Device Provider.
* Upload Root CA and Sub CA Certificates
* Approve/Reject SBI
* Approve/Reject associated devices of an SBI
### Upload Root CA and Sub CA
Only after Partner Admin 'Upload Root CA and Sub CA Certificates' that a Partner will be able to 'Upload CA signed Partner Certificate.
As a process of partner onboarding onto PMS after successful registration, Partner is required to **Upload CA signed Partner Certificate** on behalf of their organisation which would be used to build a 'Trust Store' in MOSIP to cryptographically validate that they are from a trusted organisation.
A **Certificate Authority (CA)** is an organization that acts to validate the identities of entities (in this case, a partner organisation) and bind them to cryptographic keys through the issuance of electronic documents known as **Digital Certificates**. A country needs to onboard valid CAs before onboarding any partner as MOSIP will only accept certificates which are signed only by a Trusted CA.
#### Upload Root CA and Sub CA Certificates
1. Go to **PMS Portal** and login as Partner Admin.
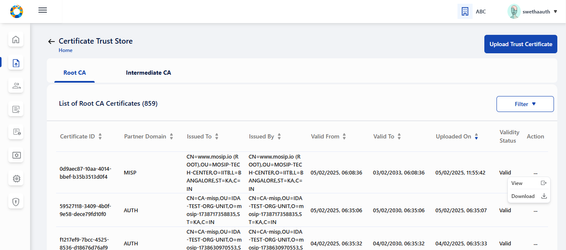
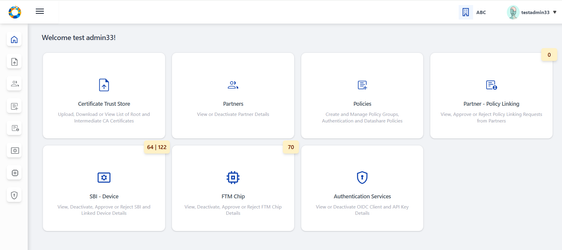
2. Click on **Certificate Trust Store** on Admin dashboard.
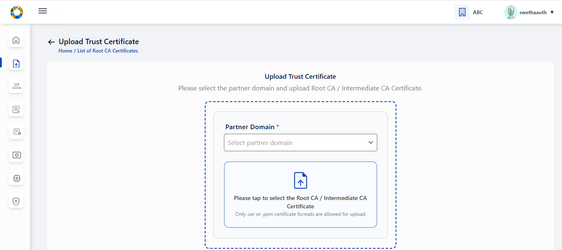
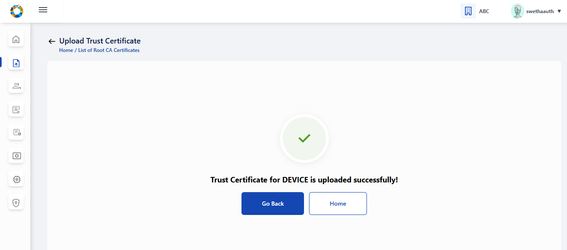
2. Within Root CA tab click on **Upload Trust Certificate** button on the top-right of the screen.
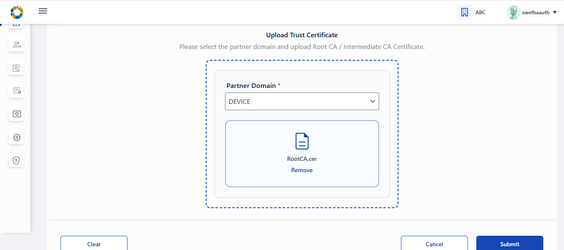
3. Select the Partner Domain (AUTH)
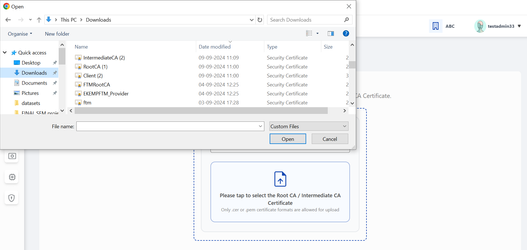
4. Choose the **Root CA Certificate** to upload (only files with extensions as .cer or .pem).
5. Click Submit, an appropriate success message appears and confirms the upload.
6. Similarly, sub/Intermediate CA certificate should be uploaded by following the above steps (2-4) by navigating to **Upload Intermediate CA Certificate** button provided within Intermediate Root CA tab.
## What all activity can a Partner (Device Provider) perform?
To be able to access the services by PMS and to validate that the partner (Device Provider) is from a trusted organisation, undergoing self registration on PMS and uploading CA signed certificate is necessary'.
* Self Register on PMS Interface
* Upload CA signed Certificate
## Self-Register on PMS as Device Provider
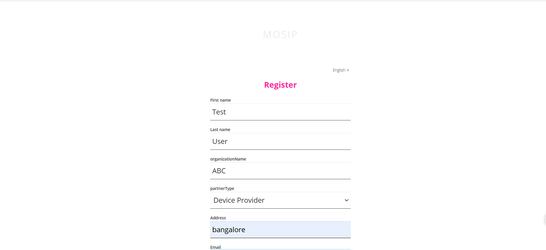
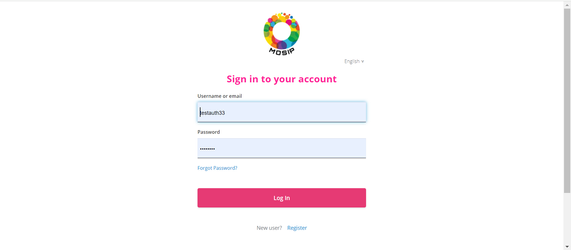
1. The Device Provider can register themselves on PMS by clicking **Register** on the Login Page, a form comes up.
2. Enter the Authentication Partner details:
1. Partner type (Device Provider)
2. First and Last name
3. Organization Name
4. Address, Phone Number
5. e-mail, Username and Password
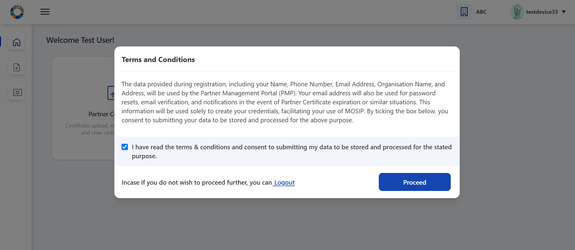
3. **On successful registration**, you will be asked to read through '**Terms and Conditions**' and having carefully read through it you can agree and accept it.
**Validations**:
* **Terms & Conditions**: Partner consent refers to voluntary and informed agreement provided by a **Partner User** on behalf of the Partner Organisation to a specific action or process where the users have a clear understanding of what they are consenting to. User consent is important to ensure data privacy, where it is compliant to obtain explicit consent from partners before collecting, processing, or sharing their personal organisation level data.
* A detailed description explaining which of their personal and organisation data is used and for what purposes it will be used in PMS will be informed while seeking user consent.
## Login:
* For existing partner users who are already registered with PMS Portal, they can login to the portal through their email username and password.
* On login, the User lands on Partner Dashboard (considering the pre-requisites such as policy group selection and consent are already completed).
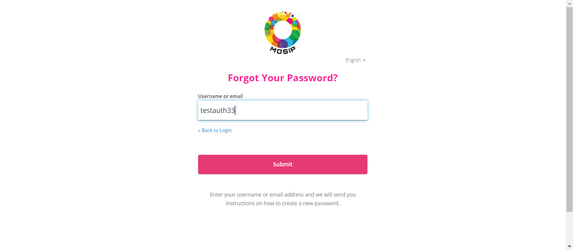
## Forgot Password:
* Partner User has option to 'Reset Password'.
## CA Signed Partner Certificate Upload / Download or Re-Upload
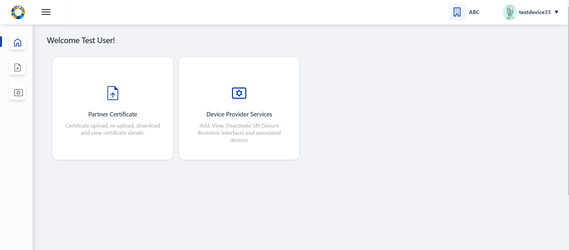
You are now on [Home Page/Dashboard](https://docs.mosip.io/1.2.0/modules/partner-management-services/pms-revamp/functional-overview/auth-partner/end-user-guide#interface-overview) where the following features are provided to Device Provider:
1. Partner Certificate
2. Device Provider Services: SBI and Device creation
Once registered through the process of 'Partner Onboarding' with PMS after successful registration, user is required to perform 'Upload CA signed Partner Certificate' on behalf of their organisation which would be used to build a trust store in MOSIP to cryptographically validate that they are from a trusted organisation.
**Tips**:
Later when required a Partner can also 'Download Certificate' and 'Re-Upload Certificate' (As the need may be).
**Important**:
Before a Partner can upload a 'CA Signed Certificate' it is prerequisite that the 'Partner Admin' should have already had uploaded the **Root CA** and **Intermediate CA** certificates.
### Upload CA signed Certificate\*\*
1. Go to **Device Provider Dashboard.**
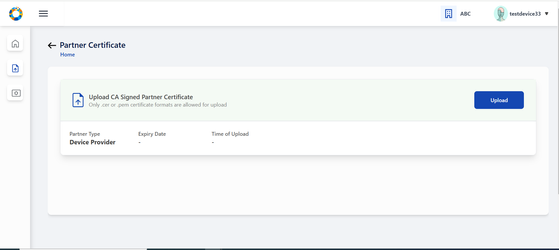
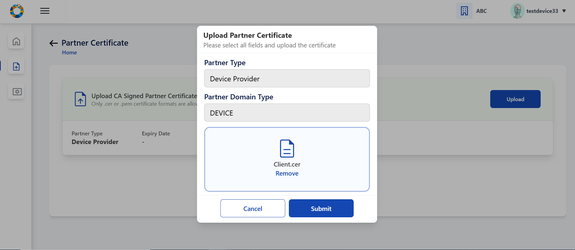
2. Click on **Partner Certificate** option > Click on the **Upload** button to upload the partner certificate signed by CA.
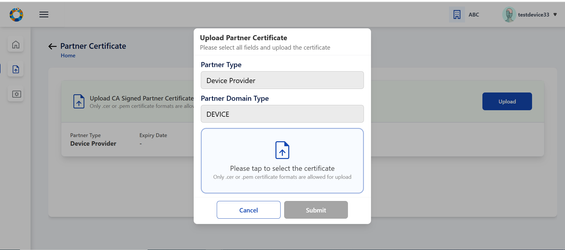
3. Select the CA signed partner certificate from local system by clicking on the upload section (blue area).
4. Certificate is successfully fetched from local system.
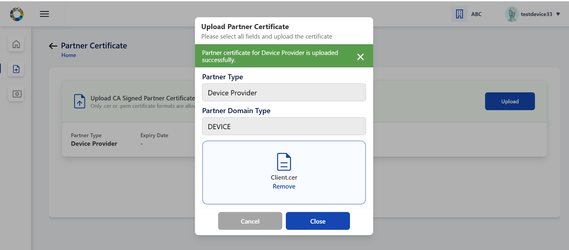
5. Click on **Submit**, Partner Certificate is uploaded successfully.
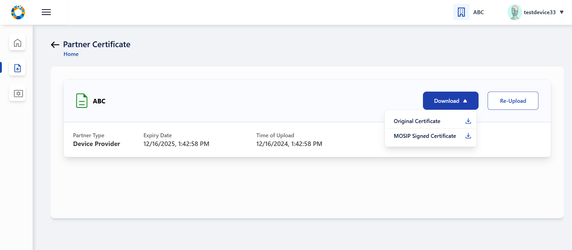
6. On closing the popup, The user can view the uploaded certificate details in the form of a list view.
### Download Certificate
There is also an option to download initially uploaded CA signed certificate and also the MOSIP Signed Certificate.
### Re-Upload Certificate
Re-uploading certificate is required in cases MOSIP Signed Certificate gets expired after one year.
**Note:**
MOSIP Signed Certificate has a validity of 1 year from the time of Partner Certificate Upload.
You must ensure that you re-upload the partner certificate again so that new MOSIP signed certificate can be generated and other functionalities such as Device Provider Services (SBI, Devices) can function.
## Device Provider Services
After the you (Partner) have uploaded partner certificate, you can now perform 'Device Provider Services':
* SBI: Add SBI (The request is sent to Admin for approval).
* Devices: After approval from a given SBI, devices can be added within it which is then sent to Admin for approval.
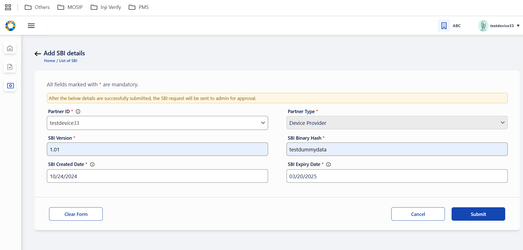
## Add SBI
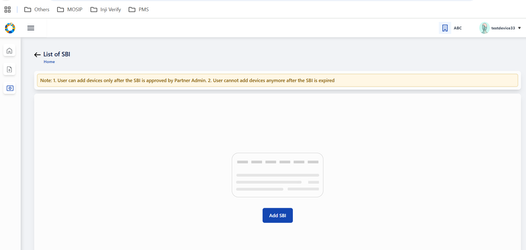
Click on 'Add SBI' button which takes you to 'Add SBI Details' screen, here you can add details of Secure Biometric Interface (SBI).
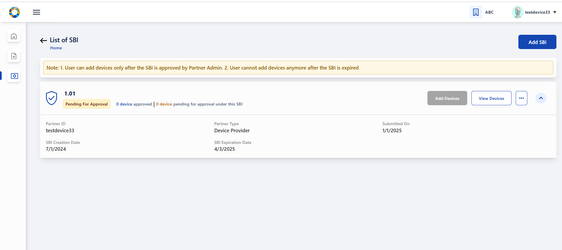
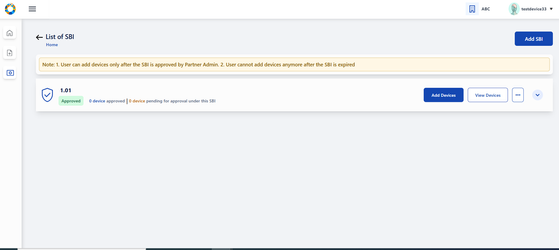
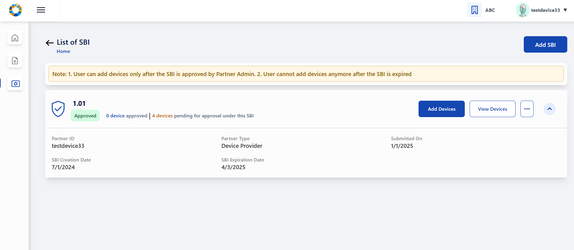
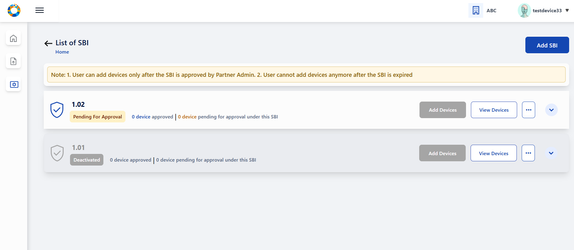
The SBI details you submit is sent to Admin for approval and is displayed for the partner in **'List of SBI'** page.
You (Partner) can add devices only if the corresponding SBI has been approved by Admin.
**Note**
1. You can add devices only after the SBI is approved by Partner Admin.
2. You cannot add devices if the SBI is expired
3. Even if SBI has expired it is still visible to Partner Admin for approval/rejection.
4. If the SBI version is both deactivated and expired, deactivation will take more precedence.
## Partner Admin's portal: (To approve / reject SBI)
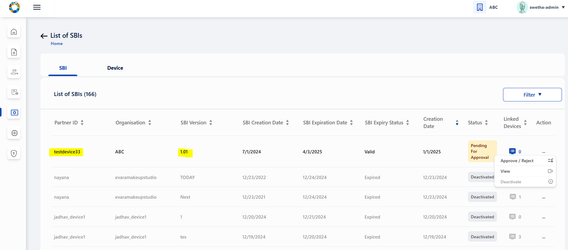
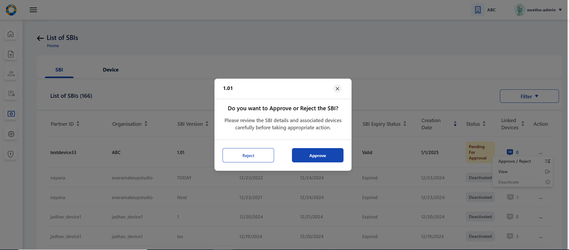
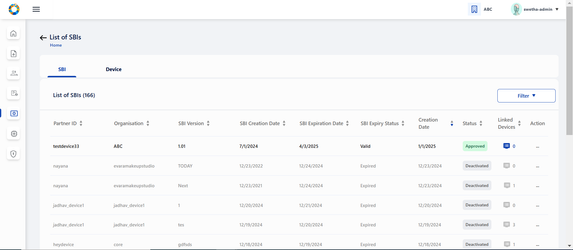
You (Partner Admin) can approve or reject SBI.
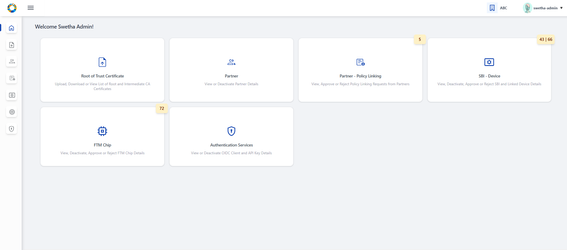
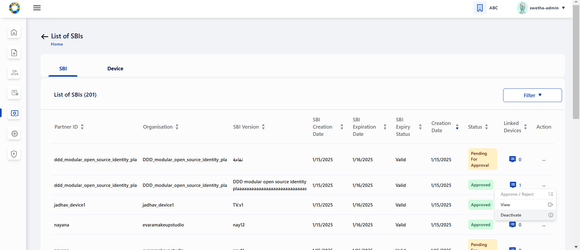
Go to Dashboard → SBI-Device → List of SBIs
You (admin) can select Approve or Reject option from the given record.
On approval, the status changes to 'Approved' and on rejection the status changes to 'Rejected'.
## Partner's Portal - (Add Device)
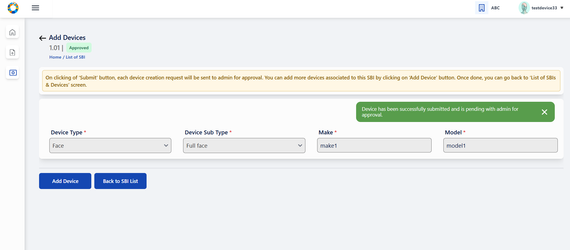
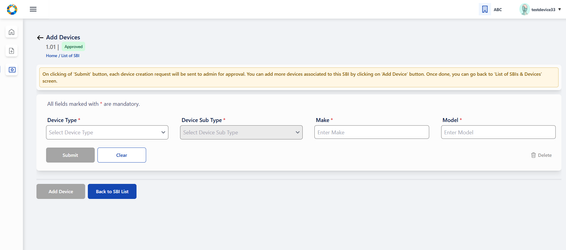
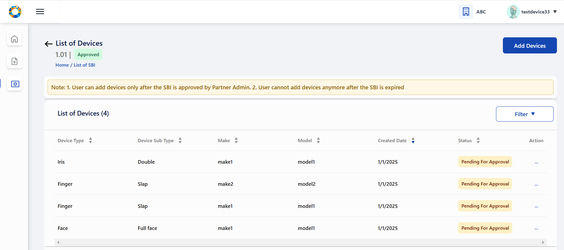
To **Add Devices** under a given SBI, click on 'Add Devices'.
**Note**:
* Option to Add Device is only provided if the SBI is in 'Approved' status.
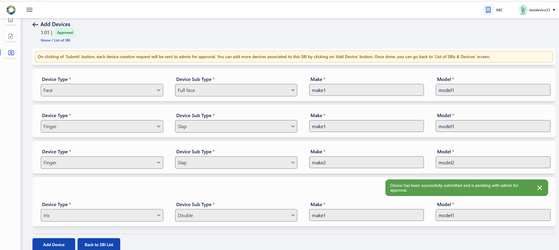
Each device detail added gets submitted for admin approval.
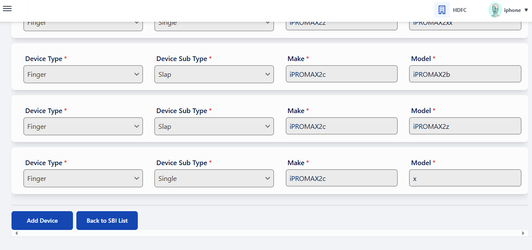
A maximum of 25 devices can be added and viewed at once within this page.
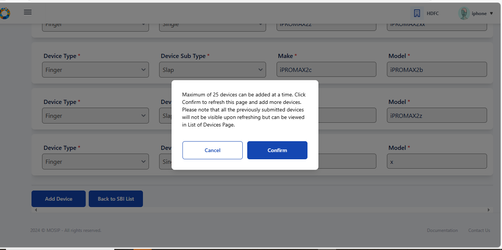
On clicking Add Device button after submitting 25 devices a warning popup is displayed as following
* Maximum of 25 devices can be added at a time. Click **Confirm** to refresh this page and add more devices. Please note that all the previously submitted devices will not be visible upon refreshing but can be viewed in List of Devices Page.
To add more than the stated number (25 devices), the user confirms by clicking on the popup, the page undergoes automatic refresh with all the previously submitted devices not displayed anymore as shown in the below screenshot and then the devices can be added sequentially.
Once all the required devices are submitted, Clicking on 'Back to SBI List' button navigates to 'List of SBIs' page.
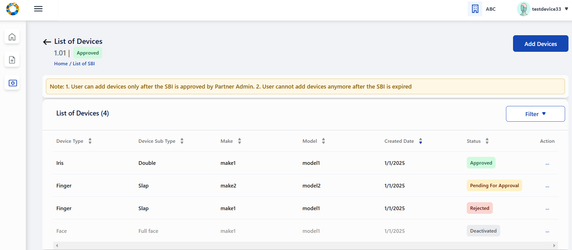
All devices pertaining to a given SBI can be viewed in a tabular structure by clicking on View Devices provided in each SBI card of List of SBIs page.
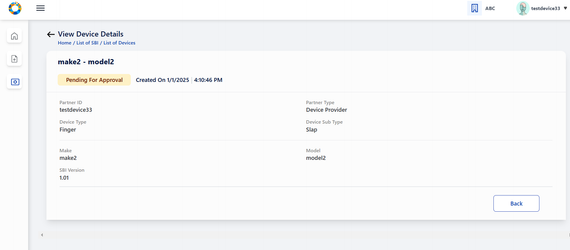
Each device record can be viewed individually (in both Partner and Partner Admin portal) by clicking on record itself or on clicking View option in action menu of the corresponding device. The partner admin is taken to **'View Device Details'** for detailed view.
## Partner Admin portal for approval/rejection of devices
To approve / reject a device, you (admin) can click on SBI-Device card on homepage.
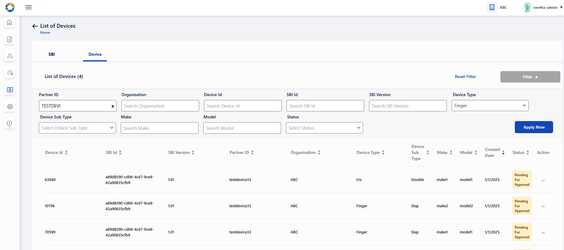
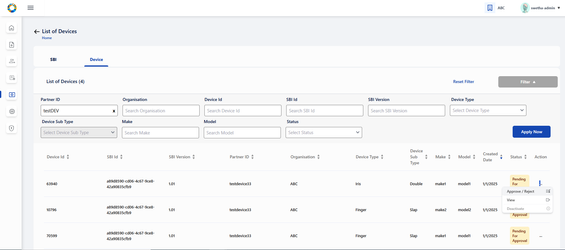
On clicking 'Devices' tab, **List of all Devices** submitted so far are displayed.
On clicking the action menu of the respective device record, an option 'Approve/ Reject' is provided
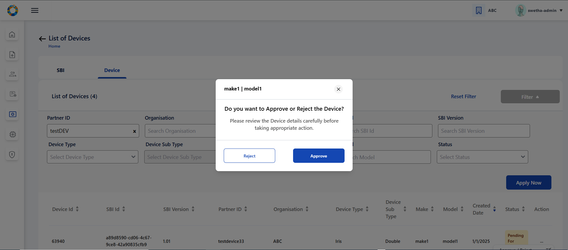
A popup window appears for the admin to take appropriate action- APPROVE/ REJECT and select the respective button
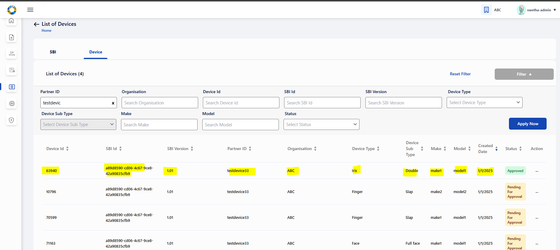
The status is thus updated accordingly in **List of Devices** Page as Approved/ Rejected based on the above action.
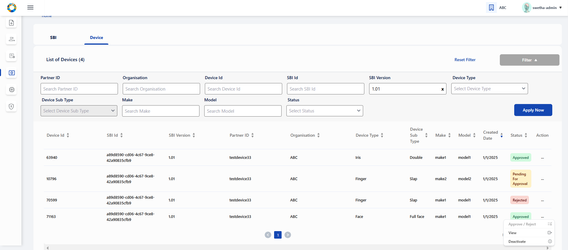
'Pending for Approval' status is displayed when the device request is pending with admin for approval and no action has been taken by admin yet.
## Deactivate Device
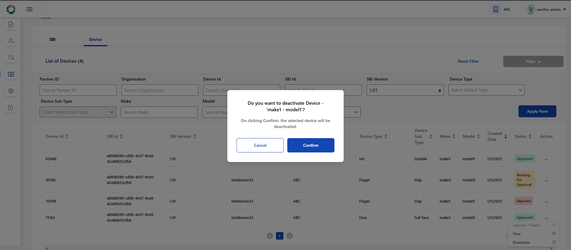
Partner / Partner Admin can deactivate an active device any time provided it is in 'Approved' status. To perform deactivation, click on 'Deactivate' option in the action menu of the given Device in 'List of Device' page.
On clicking Deactivate option, a popup window appears seeking for confirmation.
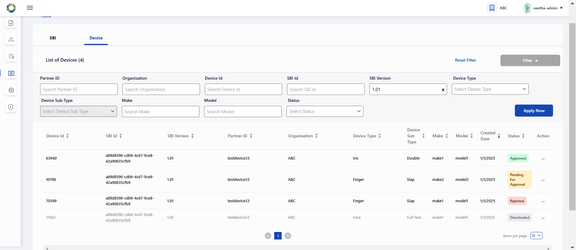
On clicking Confirm, the status of the device changes to 'Deactivated' and the record is greyed out in the List of Devices page.
## Deactivate SBI
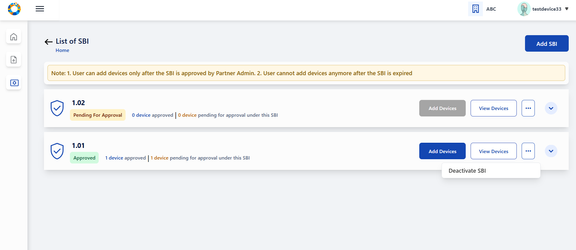
Partner / Partner Admin can deactivate an active SBI any time provided it is in 'Approved' status. To perform deactivation, click on 'Deactivate' option in the action menu of the given SBI in 'List of SBI' page.
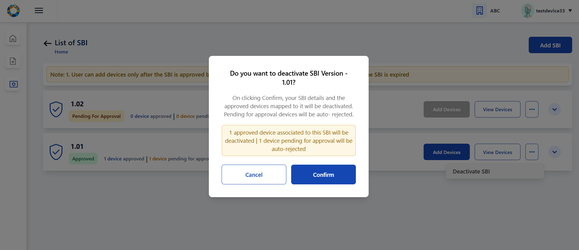
On clicking 'Deactivate SBI', a popup window appears seeking for confirmation and cautioning the admin about the impact on associated devices.
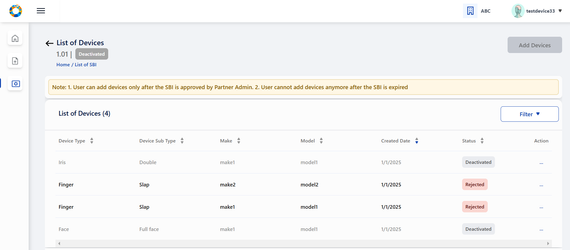
On deactivation of SBI - the devices associated to it gets impacted as below:
* All **approved** device records are displayed in **'Deactivated'** status and those row items being greyed out.
* The devices of which the status was **'Pending for Approval**' before SBI deactivation will now be displayed with **'Rejected'** status, which means devices get auto-rejected.
* **Rejected** devices will continue to remain in the same status even after SBI deactivation.
The SBI record is greyed out and devices cannot be added anymore within it.
### Status of Devices before SBI Deactivation
* Previously **approved** device records are displayed in **'Deactivated'** status and those row items being greyed out.
* Devices which were **'Pending for Approval**' before SBI deactivation will now be displayed with **'Rejected'** status, which means devices get auto-rejected.
* Devices which were earlier **rejected** continue to remain in the same status even after SBI deactivation.
### Impact on status of Devices after SBI Deactivation
Option to deactivate an SBI is also available to Partner Admin by clicking on 'Deactivate option' in action menu of approved SBIs in List of SBI page.
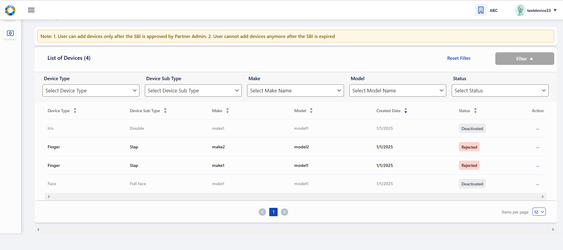
## Filter section in Partner portal
* It displays an expandable and collapsible filter section on consecutive clicks.
* Here each filter field is a drop-down and the tabular results dynamically updates based on the drop-down item selected.
* Once the filter section is expanded, the filter button thus becomes disabled.
* On applying filters, the ( ) beside 'List of Devices' title should display the total number of filtered results.
* User will have to use Reset Filter to remove the Filters. On clicking it, page will reload and the entire results are displayed in the tabular view , instead of filtered results..
---
# Agent Instructions
This documentation is published with GitBook. GitBook is the documentation platform designed so that both humans and AI agents can read, navigate, and reason over technical content effectively. Learn more at gitbook.com.
## Querying This Documentation
If you need additional information that is not directly available in this page, you can query the documentation by asking a question.
Perform an HTTP GET request on the following URL with the `ask` and `goal` query parameters:
```
GET https://docs.mosip.io/1.2.0/id-lifecycle-management/support-systems/partner-management-services/functional-overview/device-provider.md?ask=&goal=
```
`ask` is the immediate question: it should be specific, self-contained, and written in natural language.
`goal` is what the user is ultimately trying to achieve, the reason they need the answer. Sharing it helps GitBook give you a better, more relevant answer. A goal is most helpful when it describes the outcome the user wants rather than restating the question. For example, with `ask=how do I create an API token`, a goal like `automate deployments from our CI pipeline` lets GitBook tailor the answer to that use case.
The response will contain a direct answer to the question and relevant excerpts and sources from the documentation.
Use this mechanism when the answer is not explicitly present in the current page, you need clarification or additional context, or you want to retrieve related documentation sections.